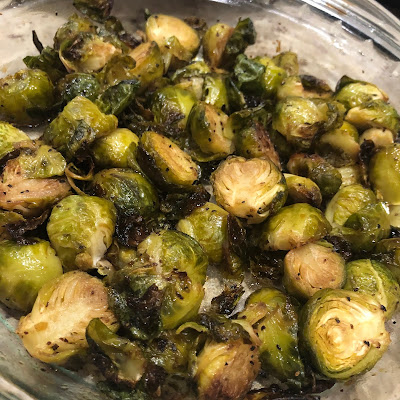
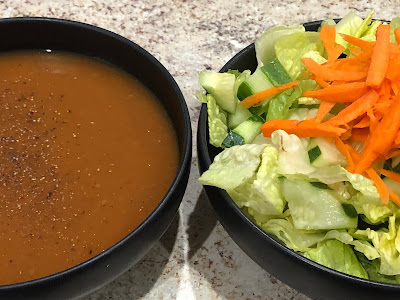
Hope everyone had a wonderful Thanksgiving! Given the sorry state of 2020 as a whole it's nice to take a minute to spend some time with friends or family and remember what we're all really thankful for. I thought I's share with you what we ate at my house. Delicious vegan gluten free food is definitely one thing to be thankful for ;)
Pages
Wednesday, 16 December 2020
Thanksgiving 2020
Mushroom and Leek Pithivier Pie
So this was delicious but it didn't exactly turn out the way it was supposed to. I adapted it as vegan and gluten free from Jamie Oliver's Pithiver Pie Recipe. He has quite a few vegan recipes on his website. Obviously Jamie makes it look easy (seriously check out the video on him making it-it's so pretty) but my mound didn't set properly (despite doing it a day in advance which he suggests) so it ended up being a deep dish pie. I think maybe I didn't layer the celeriac properly or I put in too much sauce. I guess I missed the part where you reserve some sauce for later. Still super delicious though! The only negative feedback from the family was that they didn't like the celeriac but I think I didn't bake it long enough! Really the most tedious part was the making of the puff pastry but if you have a vegan GF brand you can find please use that!
Mushroom and Leek Pithivier Pie
Ingredients
1 whole celeriac (1kg)
olive oil
2 large leeks
2 Tbls of unsalted vegan butter
2 cloves of garlic
400 g mixed mushrooms
75 g plain GF flour
2 teaspoons English mustard
800 ml non-dairy milk
1 bunch of fresh flat-leaf parsley (30g)
120 g vegan feta or blue cheese
2 x 320 g sheets of puff pastry (cold)
Vegan butter melted as wash
Method
Preheat the oven to 200ºC/400ºF/gas 6. Scrub the celeriac, rub with 1 tablespoon of oil and wrap in tin foil.
Roast for 1 hour 30 minutes, then finely slice and season with sea salt and black pepper.
Meanwhile, halve, wash and finely slice the leeks, then place in a large casserole pan on a medium heat with the butter.
Peel, finely slice and add the garlic and mushrooms, then cook for 15 minutes.
Stir in the flour and mustard, followed slowly by the milk, then simmer for 5 minutes, or until thickened, stirring regularly, and remove from the heat.
Pick, finely chop and stir in the parsley, crumble in the cheese, then season to perfection.
Line a 20cm bowl (8cm deep) with clingfilm.
Arrange slices of celeriac in and around the bowl until covered.
Reserving half the sauce, layer up the rest with the remaining celeriac in the bowl, finishing with celeriac.
Pull over the clingfilm, weigh it down with something heavy, and chill overnight with the remaining sauce.
Preheat the oven to 180ºC/350ºF/gas 4.
On greaseproof paper, roll both sheets of pastry out to around 30cm x 35cm.
Unwrap the filling parcel and place in the middle of one sheet. Beat the egg and brush around the edge of the pastry and all over the celeriac, then carefully lay the second piece of pastry on top, smoothing around the shape of the filling.
Trim the edges to 2.5cm, crimp to seal, then butter wash all over.
Very lightly score the pastry (like in the picture), making a small hole in the top.
Bake at the bottom of the oven for 2 hours, or until beautifully golden, brushing with more butter wash once or twice, then serve with the warmed-up creamy sauce.
Vegan Gluten Free Puff Pastry
This is definitely a recipe that takes effort and time but the result is pretty awesome. It involves making dough and then a slab of butter that is slowly folded in, set then folded again and so forth. The result is Vegan Gluten Free Puff Pastry - at the least the best I've come across so far. You can make a bigger batch and then freeze what you don't need. Prep time is around 1 hour and it makes nearly 2lbs of dough. Original recipe courtesy of Gluten Free on a Shoestring. There is a video there that is helpful as well.
Vegan Gluten Free Puff Pastry
Ingredients
For the dough
2 cups (280 g) all purpose gluten free flour, plus more for sprinkling (my Better Than Cup4Cup Flour work best here)
1 teaspoon xanthan gum (omit if your blend already contains it)
3/4 teaspoon kosher salt
4 tablespoons (56 g) unsalted vegan butter, diced and kept cold
1/2 to 3/4 cup (4 to 6 fluid ounces) cold water, iced (ice doesn’t count in volume measurement), plus more as necessary
For the butter packet
4 tablespoons (35 g) all purpose gluten free flour
16 tablespoons (224 g) cold unsalted vegan butter
Method
Dough: In a large bowl, place the 2 cups flour and salt, and mix or whisk to combine well.
Add the chopped unsalted butter and toss to combine.
Press each chunk of butter flat between your thumb and forefinger.
Create a well in the dry ingredients, and add 1/2 cup of ice water to the center then stir the mixture to combine.
Add more ice water by the tablespoon until the dough stays together when pressed.
Press the dough into a ball, place it onto a piece of plastic wrap and wrap tightly.
Place in the refrigerator to chill until firm while you make the butter packet.
Butter Packet: Dust a sheet of parchment paper or bare flat surface with 2 tablespoons of flour.
Place the two sticks of butter, side by side and touching one another, in the center of the flour.
Sprinkle the butter with the remaining 2 tablespoons flour.
Cover with another sheet of parchment paper (or not), and pound the butter with the rolling pin to begin to flatten it and to press the two sticks of butter together.
Remove the top sheet of parchment, fold the butter in half, and cover once more.
Pound again until flat, and repeat the process until you have a butter packet that is about 4-inches square.
Wrap the butter packet tightly in plastic wrap and place it in the freezer to chill for about 5 minutes, or in the refrigerator for about 15 minutes, or until beginning to firm.
Combine dough and butter packet: Remove the chilled dough from the refrigerator, and place it on a lightly floured surface.
Sprinkle lightly with more flour, and press and roll the dough until it is smooth, folding it over on itself as necessary.
Press it into about a 6-inch round.
Unwrap and place the chilled butter packet in the center of the round of dough. Lightly score the perimeter of the butter packet, and set the butter packet aside.
Dust the top of the dough once more with flour, and roll out the dough from the 4 scoring marks and out, away from the center of the dough, to create 4 flaps.
Dust with more flour as necessary to prevent the rolling pin from sticking to the dough and move the dough frequently.
Place the butter packet back in the center of the dough, and fold the 4 flaps onto the butter like you would the bottom of a cardboard box.
Press the dough around the butter packet to seal it in.
Complete the first fold: Sprinkle the top of the dough with flour, and roll the dough away from you into a long rectangle that is about 1/2 inch thick and about 3 times as long as it is wide.
Shift and turn the dough frequently to prevent sticking.
Starting at a short side, fold the rectangle into thirds as you would a business letter.
Beginning from a long side, roll the dough again, into another long rectangle, the same size and shape. Fold in the same manner, once again, starting at a short side and folding into thirds.
You have just completed the first fold.
With a floured knuckle, make one single impression on the dough, to represent the completion of one turn.
Cover the dough with plastic wrap and place in the refrigerator until firm, about 15 minutes.
Once the dough is firm, remove it from the refrigerator, flour the outside and once again, with a long side of the folded dough facing you, roll away from you and into a long rectangle about 1/2 inch thick.
Fold once more, and mark the dough twice with your knuckle, to represent two completed turns. Refrigerate until firm, and repeat the process of rolling, folding, marking and chilling for at least 4, and up to 6, turns.
After the final fold, fold the “business letter” of dough in half or thirds to create a smaller packet. Wrap tightly and refrigerate or freeze until ready to use. If you freeze the puff pastry, defrost overnight in the refrigerator before using.
Glazed Brussels Sprouts
Wednesday, 21 October 2020
Rosella Syrup (Hibiscus Syrup)
I got my recipe from a mix of the Freshly Cook and Paleo Princess. Hibiscus Syrup is a very popular treat in Australia (although you'll find it sold all over the world now), especially around Xmas time. We add it to the bottom of our champagne glasses, and as well as looking beautiful it will add a lovely flavor to even the cheapest of sparkling wines :) It's great as a cordial too to mix with seltzer water or used like Grenadine for cocktails. If you have your own plant there are some great YouTube videos on how to pick and prepare. I got mine delivered from a local farm and they were already picked, but I had to prep them.
Saturday, 17 October 2020
Onion Gravy (Bangers & Mash)
Beer Battered "Fish" & Chips with Tartar Sauce
Original recipe for the Beer Battered Fish Sticks from My Darling Vegan. I like "pub style" or steak fries so I slice my potato into thick strips and shallow fry in vegetable oil. I remember going to the beach and gettin fish and chips with my family, I have such fond memories so I've been craving this lately. Obviously this isn't the healthiest of recipes but the kids loved them.
"Lobster" Lettuce Cups
This original recipe from Follow Your Heart made a ton of sauce, even half of it was too much for the recipe in my opinion. It was very overpowering so you didn't need too much.
"Lobster" Lettuce Cups
Ingredients
¼ Cup Green Onions or Chives
4-6 Leafs Butter Lettuce Leafs
1 Avocado Sliced
¼ Cup Follow Your Heart Dairy-Free Feta Crumbles
2 Cups Chopped Hearts of Palm
2 Cups Chopped Oyster Mushrooms
1.5 Tbsp Minced Garlic
2-3 Tbsp Vegan Butter
1/8 tsp Smoked Paprika
Lobster Mayo Mix
2 cups Vegenaise
⅓ Cup Diced Celery
2 Tbsp Fresh Dill
2 Tbsp Chopped Fresh Chives
¼ Cup Diced Red Onion
1.5 Tbsp Maple Syrup
1 Tbsp Mustard Powder
½-1 Tbsp Smoked Paprika
2.5 Tbsp Old Bay Seasoning
2 Tbsp Lemon Juice
1.5 Tbs Kelp Powder or Japanese Multi-Purpose Seasoning (I used Dulse Flakes)
½ Tsp-1 Tsp Pink Himalayan Salt
½ Tsp Black Pepper
I also add a teaspoon of Japanese Plum Vinegar which is like adding sea water.
Method
In a pan, sauté your Hearts of Palm and Oyster Mushrooms in your Vegan Butter and Minced Garlic. Season with Smoked Paprika
In a large bowl combine all of your ingredients for the Lobster Mayo until well incorporated.
Build your Lettuce Cups with Butter Head Lettuce, Avocado Slices, Combined Lobster Mayo Mix , Feta Cheese, Smoked Paprika, and top with Chopped Green Onion or Chives.
Daikon “Bacon”
Place on some paper towel to soak up the extra grease and serve!! I LOVE me a vegan BLT!
Friday, 2 October 2020
Vegan Beauty Product Review - October 2020
Well it has been a while since I've done much beauty product reviewing I wanted to review some products I've been using lately that I LOVE!
The first is very exciting because I've been waiting for an affordable vegan lash serum for years! Now I found one! This Grande Lash-MD I got from Sephora and it comes in a trial size for $40 or the full size for $60. I started with the trail size and in that 8 weeks it was enough to see some impressive results. Sorry my pictures aren't great but you get the idea! I noticed a difference by the 6 week mark. I also bought their brow serum and have seen a difference for sure, very helpful for those patches that haven't been growing back since I plucked them to death in the 90s! I'm definitely going to keep using to see how long I can get them all!

You can really notice the long ones lashes with mascara since my ends are light. This was around the 8 week mark.
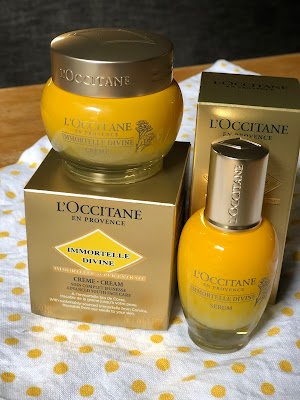
My next happy purchase is something very exciting to me! L'Occitane which makes a lot of gorgeous vegan products in France just redid their best selling anti-aging skin care line, Immortelle Divine, with vegan formula. So awesome. I noticed a difference overnight, I used the new Super Extract Divine Serum followed by the Cream and my skin felt amazing in the morning and the blemishes I had the night before were almost gone. Seriously excited about them redoing this line, the eye cream is next, yay!!
Thursday, 17 September 2020
The Starch Solution - Take 2
So I've been following Plantiful Kiki on YouTube and Instagram and she lost over 65lbs with Dr. McDougall's program The Starch Solution. Seriously check her out, she's adorable and so inspiring. Plus she makes her whole family eat like this so she's definitely a superstar to me! She has a lot of great meal ideas and goes through full days of what she eats. In her videos she outlines the basic principles and how she got results which I found very helpful because I guess when I listened to the audio of the book there were some things I missed. Here's a link to my first attempt (which was a few months ago). I think where I went wrong was trying to follow all the recipes so Kiki's method simplifies all that. Don't get me wrong, I did lose 10lbs but I'm hoping Kiki's method will keep me on track for longer. I'm going to outline what Kiki mentioned that I am incorporating this time round...
The basic principles are still there, eat only plant based whole foods (no caffeine and alcohol) but in the weight loss stage there are some important factors I missed;
- No fat. I knew that meant oil/butter etc but I didn't realise that also includes fatty whole foods like avocados (my babies!!!) and nuts. You can add these back in moderation once you hit your healthy goal weight.
- There are three different ways to organize your plate to optimized your weight loss that involves how much starchy vs non-starchy vegetables to eat. The 50/50 plate is the most common and the one Kiki used for her weight loss. 50/50 will get your there, you just have to be patient. This is a change of lifestyle and routine to take control of your weight and health, not a crash diet.
- Eat the non-starchy side first, always! You can have seconds, thirds, fourths until your full or satisfied but every time eat the non-starchy vegetables first.
|
STARCHY |
NON-STARCHY |
|
Beans (kidney, navy, pinto, black, cannellini) Butternut squash Chickpeas Corn Parsnips Peas Sweet potatoes Taro Yams |
Amaranth or Chinese spinach Artichoke Artichoke hearts Asparagus Baby corn Bamboo shoots Beans (green, wax, Italian) Bean sprouts Beets Brussels sprouts Broccoli Cabbage (green, bok choy, Chinese) Carrots Cauliflower Celery Chayote Coleslaw (packaged, no dressing) Cucumber Daikon Eggplant Greens (collard, kale, mustard, turnip) Hearts of palm Jicama Kohlrabi Leeks Mushrooms Okra Onions Pea pods Peppers Radishes Rutabaga Salad greens (chicory, endive, escarole, lettuce, romaine, spinach,
arugula, radicchio, watercress) Sprouts Squash (cushaw, summer, crookneck, spaghetti, zucchini) Sugar snap peas Swiss chard Tomato Turnips Water chestnuts Yard-long beans |
|
Waist: 37" Hips: 42" Chest: 39" Thigh: 23" |
Waist: 34.5" Hips: 40" Chest: 37" Thigh: 22.5" |
- You can use frozen and canned vegetables.
- Don't feel like you have to eat raw, you don't. Just don't use fat to cook. Try blanching, steaming, sauteing and baking. If you have an air fryer that works well too!
- I love my slow cooker so I used that.
- I used oil free seasonings and condiments to make it more interesting. I especially loved using balsamic vinegar (good quality like Mountain Town Olive Oil Company-try their raspberry or 15 year aged....amazing), Garlic Salt, Trader Joe's Everything But The Bagel Seasoning, Tabasco, Chinese Five Spice, Mustard, fresh herbs & Coconut Aminos.
- My new favorite thing on almost everything is garlic salt and nutritional yeast.
- Calorie free seltzer water like Bubly helped me a lot when I was on the go to full me up but mostly at night when I'd normally want a glass of wine.
- Having prepared foods helped a lot too, another great tip from Plantiful Kiki! Baking a bunch of potatoes & sweet potatoes once or twice a week and keeping them in the fridge helped make the meals times go smoothly. I love my rice maker but I also keep the Trader Joe's Organic Brown Rice microwave pouches in the freezer for quick rice when I need it.


