Friday, 11 February 2022

The Best Vegan Chili

This is probably one of the best chili recipes I've ever tried - we did not use the jalapenos because the kids don't do well with spice. Original recipe is from Kelli Foster on The Kitchn. Goes really well with this cornbread recipe!


The Best Vegan Chili

Ingredients

2 tablespoons olive oil
1 large yellow onion, diced
2 stalks celery, diced
1 medium jalapeño, seeded and diced
4 cloves garlic, minced
1 tablespoon unsweetened natural cocoa powder
2 tablespoons chili powder
1 tablespoon ground cumin
1 teaspoon smoked paprika
1 teaspoon kosher salt
1/2 teaspoon freshly ground black pepper
1 tablespoon light or dark molasses
1 cup dried red lentils
1 (28-ounce) can fire-roasted diced tomatoes
3 1/2 cups low-sodium vegetable broth
1 (15-ounce) can black beans, drained and rinsed
1 (15-ounce) can kidney beans, drained and rinsed
For serving (optional):
2 medium avocados, diced
4 medium scallions, thinly sliced

1 medium jalapeño, seeded and thinly sliced


Method

Heat the oil in a Dutch oven over medium heat until shimmering. 

Add the onion, celery, jalapeño, and garlic, and cook until soft, 6 to 8 minutes. 

Add the cocoa powder, chili powder, cumin, paprika, salt, and pepper, and stir to combine. 

Cook for 2 minutes, stirring frequently to ensure the spices don’t burn. 

Stir in the molasses and lentils and cook for a minute more.

Add the tomatoes, broth, and beans, and stir to combine. 

Bring to a boil, then reduce the heat to low and simmer for 30 minutes, stirring occasionally to prevent the chili from sticking to the bottom of the pot.

Serve topped with avocado, scallions, and jalapeño, if desired.

Monday, 31 January 2022

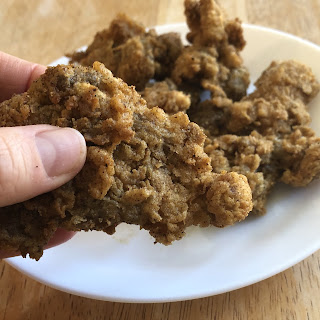
Oyster Mushroom Fried "Chicken"

This is something I have been wanting to attempt for a while because I had something similar at a food truck and it was soooo good! I just used fresh oyster mushrooms but I think they get a more chewy texture if you baked them before dredging and frying. Turned out very well though - every last one was eaten and the whole family loved them (my family is very fussy, just for reference LOL). I used a combination of spices that are known as the "KFC 11 Herbs & Spices" and added my own secret ingredient!

Oyster Mushroom Fried "Chicken"

Ingredients

Oyster Mushrooms (around 15 large), washed and dried and hard ends cut off.

2 Tbls Spice mix

4 Tsp Chicken salt* (my secret ingredient - great on fries too!)

2-3 cups chickpea flour

2 cups egg replacer mix (I used Ener-G brand)

Oil for frying (I like vegetable or sunflower)

Spice Mix

2 tsp dried thyme

2 tsp dried basil

1 tsp dried oregano

1 tbsp celery salt

1 tsp black pepper

1 tbsp dry mustard powder

4 tbsp paprika

2 tbsp garlic powder

1 tbsp ground ginger

2 tbsp white pepper


Method

Pre mix the spice mix and store extra in an air tight container.


Add frying oil to your deep pan (I used cast iron), you want around 2" deep in oil.
Heat on medium high until oil reaches a temperature that sizzle when something is thrown in. I use a sprinkle of flour to test.
While oil is heating add 2 Tbls spice mix and 2 tsp chicken salt to the flour and whisk tthrough.


Create your egg replacer according to packet instructions and set aside.
Once oil is ready fry in batches (I did mine in three batches) by dredging in egg replacer and then coating in the flour mixture.
Let brown on each side, this only takes a minute to happen, you may need to turn your heat down to medium.
Remove and lay on some paper towel while you finish the other batches.
Taste and if you think it needs it sprinkle with some more chicken salt.
I'd like to recommend a sauce but we didn't get that far - they were eaten up with no sauce required ;)


*This is the brand of chicken salt I buy from Amazon - it is vegan, don't let the name fool you. Great on potatoes/fries as well!


Friday, 28 January 2022

28 Day Whole Food Cleanse

During this "Dry January" not only am I off the booze but also trying a whole food cleanse from Plantiful Kiki (if you’ve never heard of her I suggest following on IG- she lost 70lbs on the Starch Solution diet and has been an advocate ever since). The ebook called “Plant Lean - 28 Weight Loss Meal Plan” is based on the principles of The Starch Solution by Dr McDougall but the recipes are far from boring. I enjoyed them so much more than the Starch Solution website meals. I had had a lot of success in the past with The Starch Solution but I struggled to make recipes that weren't boring because I was so stuck on the 50/50 rule. This cleanse takes the headache out and leaves you with delicious, satisfying meals.

The ebook cost $10.50 (for me including tax) and I can view it on my phone, tablet etc. I also like that she has everything hyperlinked so you can jump back to where you need to go, plus she also gives you not just the full menu but the full shopping list for each week. The calorie amount listed under each meal but she has formulated it so they all are of roughly an equal amount making it very easy to switch them around based on your needs.

One week in and I'm enjoying it and not dreading another 3 weeks which is awesome.

I've been walking 5-6 times a week for 45-60mins.

This is what some of the meals in Week 1 looked like...


Week 1

Chickpea Curry with steamed asparagus and brown rice


Egg Salad Sammy with house salad and homemade ranch


Vacation Vibes Smoothie


Sunrise Smoothie


Green Goodness Smoothie


Macaroni & Cheese with Smokey Apple Green Salad


Broccoli Cheddar Soup with House Salad


Week 2
Easy Enchilada Bake and Southwestern salad (I was missing some salad ingredients)


Berry Smoothie


Sushi 


Omelet


Buffalo Cauliflower Salad


Thai Red Curry


Apple Carmel Treats
There are some dessert options for the sweet cravings which I felt like I was getting at the end of week two.

 
Breakfast Burrito
This is probably one of the ones I was most excited about because I love a savory breakfast!


BBQ Salad


Thai Noodle Bowl


Week 3
Smokey Tomato Hummus Wrap


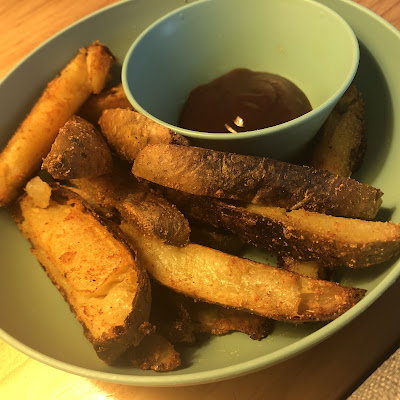
Smokehouse Steak Fries with House Salad


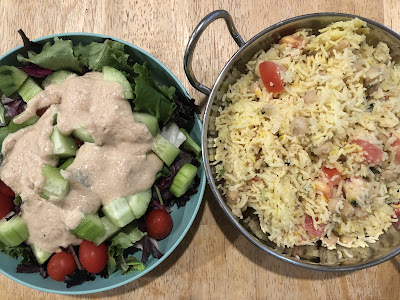
Persian Chickpea and Rice Bowl with House Salad, 
this one was tastier than I was expecting considering how few ingredients are in it.


Blueberry Pancakes


OK I got a few days into Week 4 and caved. My own fault entirely - I hadn't prepped (seriously meal prepping is key to success), I didn't have all the ingredients I needed, I really wanted chocolate and wine. I have not plausible excuse but I will say I did learn some things.
I realized how much processed vegan food I actually eat and want to cut that back a lot. 
I realized how important it is to at least have a few meals accounted for or prepped so I don't fall into the habit of grabbing something quick and processed from the freezer.
I actually enjoyed quite a few of the meals and would definitely cook them again.

Generally on this meal plan I felt very satisfied but clean and light. I enjoyed this cleanse much more than the recipes from the Starch Solution website and definitely liked how it was all planned out for me in terms of menu and shopping list. There's no reason you should fail, even though I did.
The fact the you could switch around dishes because they were all of similar calorie content and that I could make more of a dish I enjoyed for another meal definitely made it easy to stick to. I can see this being a go to reboot whenever I need one. Next time around I will know which ones I like! If I didn't mention it before the smoothies were really good!!!

There is quite a bit of prep work with some of the dishes which makes sense when your eating whole foods and making everything from scratch (main meal, plus a salad, plus sauces and dressings) but as a full time work mum of three kids and then still having to cook the kids something different I did feel a bit burnt out in the cooking fresh after the 4 weeks. No one was happy with the amount of room in the fridge I was taking up either lol!
I’d like to maybe incorporate just doing every second night or prepping more on the weekends when I know in advance what I’m going to make. 

In the 28 days I lost 5lbs which was at least something but I think the fact that I hadn't lost more by the start of Week 4 was also killed my momentum a bit. I really was following to the letter, not drinking alcohol and exercising around an hour a day. I had a black coffee in the morning but other than that only drank water and sparkling mineral water.

I'd love to hear if you have success with this or if you found something else that worked for you!


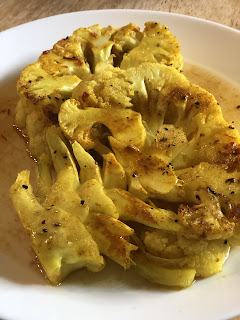
Turmeric Cauliflower Steaks

This recipe of Antoni Porowski's was from an episode of Queer Eye and although he wasn't specific about the measurements and I had to wing it I have to admit it was pretty delicious!

Turmeric Cauliflower Steaks

Ingredients

1 Cauliflower head

1 tsp turmeric powder

1 tsp salt

2 Tbls olive oil

2 cups vegetable stock (I used Better than Bouillon Vegetable)


Dressing

Juice of a lime

1/2 Tbls maple or agave syrup

1 Tbls chopped cilantro

1 tsp chili paste/sambal olak/chili flakes


Method

Preheat oven to 325F.

Remove outer leaves of the cauliflower but leave the stalk and baby leaves.

Slice down the centre and then slice each piece again. 

You're left with 2 large steaks, but I through the smaller ones in too.

In a large oven safe skillet or pan  cover the bottom with olive oil salt and turmeric and rub the steaks on both sides in the mixture.

Over a medium heat sear on both sides for a few minutes until browned.

Once seared on both sides pour in broth and place in oven for 15-20 minutes.

While the cauliflower steaks cooking whisk the dressing ingredients in a small bowl and set aside. Incorporate as much or little chili as you like depending on your spice level.

Once cooked remove steaks from the stock, add to serving plate and drizzle dressing over the top before serving.


Wednesday, 12 January 2022

ELEMIS Skin Care

ELEMIS is a gorgeous brand of natural skincare created in the UK. Their products are such high quality, I'll share a few of my favorite items. Luckily they have quite a lot of vegan products. Update: new vegan product - PRO-COLLAGEN ROSE MARINE CREAM

At the bottom I have a list of ELEMIS products that contain animal products and therefore are not considered vegan.

EMAIL direct from ELEMIS...

Thank you for your query with regards to ELEMIS products in relation to ingredients effecting Vegans.

ELEMIS specializes in natural caring ingredients of the highest quality and many ELEMIS products are considered Vegan. ELEMIS does not use animal derived ingredients however, some products do contain ingredients produced by animals such as Beeswax, Honey, Milk Protein and Milk Lipids. Please always consult the product ingredient list before purchase or contact Customer Care for more information.

ELEMIS products that contain Honey, Milk Protein, Milk Lipids, and Beeswax:

Honey:
• Pro-Collagen Quartz Lift Peel off Mask (Professional Only)
• Daily Redness Solution
• Exotic Cream Moisturising Mask

Milk Protein & Milk Lipids:
• Amino Active Mask (Professional Only)
• British Botanical Body Cream
• British Botanical Hand & Nail Butter
• Deep Cleanse Facial Wash
• Papaya Enzyme Peel
• Pro-Collagen Lifting Treatment Neck and Bust
• Pro-Radiance Hand & Nail Cream
• Sea Lavender & Samphire Hand Cream
• Sensitive Cleansing Wash
• Sharp Shower Body Wash
• Skin Nourishing Body Cream
• Skin Nourishing Body Scrub
• Skin Nourishing Milk Bath
• Skin Nourishing Shower Cream
• Total Glow Self Tanning Cream

Egg Yolk Protein:
• Absolute Oxygen Skin Calm Booster Serum (Professional Only)
• Absolute Vita C Harmony Booster Serum (Professional Only)
• Soothing Chamomile Cleanser

Beeswax:
• Aching Muscle Body Balm (Professional Only)
• Amber Intense Body Balm (Professional Only)
• BIOTEC Skin Energising Day Cream
• British Botanical Hand & Nail Butter
• Daily Redness Solution
• Frangipani Monoi Body Balm (QVC)
• Golden Azahar Body Balm (QVC)
• Green Tea Body Balm (Professional Only)
• Lip Revive
• Pro-Collagen Cleansing Balm
• Pro-Collagen Lifting Treatment Neck and Bust
• Pro-Radiance Cream Cleanser
• Rose Restore Body Balm (Professional Only)
• Sea Lavender & Samphire Hand Cream
• Skin Buff
• Men Energising Skin Scrub
• Treat Your Feet Foot Cream
• White Lotus Body Balm

If you do have any further questions or queries, please do not hesitate to contact me.

Many Thanks,

Kindest Regards
Rachel Kidner

ELEMIS
United Kingdom T: +44 (0) 117 316 1888
E-Mail: customercare@elemis.com

United States T: 1-855-235-3647
E-Mail: customercare.usa@elemis.com

Warm Artichoke & Spinach Dip

This recipe originally from Simple Veganista is sooo good and doesn't use any processed food.


Warm Artichoke & Spinach Dip

Ingredients

1 ½ cups raw cashews, pref. soaked

2 – 4 tablespoon nutritional yeast or 1 tablespoon mellow miso

1  ½ teaspoons garlic powder or 2 – 3 garlic cloves, minced

1 ½ teaspoons onion powder

1 teaspoon mineral salt, plus more as needed

salt + pepper, to taste

juice of 1 small lemon or 1 – 2 teaspoons apple cider vinegar

1 ½ cups unsweetened plain almond milk (or your favorite) or water

10 – 14 oz. spinach, frozen or fresh (see notes)

1 can (14oz.) artichoke hearts in brine, drained and finely chopped


Method

Preheat oven to 400 degrees F.

Soak, covered with 1 inch of very hot water for 5 – 10 minutes to help soften them up so they blend ultra creamy. If you have nut sensitivities, soak the cashews in cool water for 2 – 3 hours to aid in digestion.

Dice the artichoke hearts and prep the spinach.

Using your favorite blender, add the soaked cashews, nutritional yeast, garlic powder, lemon juice, salt and pepper, and liquids to the bowl and process until nice and smooth, about 3 minutes or so. Taste for flavor, adding more of anything as needed.

In a small or medium sized baking dish, add the spinach and artichoke hearts, pour the cashew cheese overtop and mix to combine. Wipe along the rim of the baking dish before baking for clean finish if you like.

Place in the oven, covered for 10 minutes, remove cover and bake another 10 minutes. Feel free to adjust the cover at any time to your preference (for me, sometimes I leave it covered the entire time).

Serve as is or give a good stir before serving. This dip is great warm or at room temperature, and is delicious scooped up with a sliced baguette or homemade crusty bread, pita chips, crackers or fresh vegetable sticks.


Note:

Spinach: If using frozen, let thaw and squeeze the excess water before using. From fresh, use about 10 oz. , steam the spinach first, give a rough chop, drain any excess water.

Make ahead: Make the recipe as directed, without baking, and place it the refrigerator for 1 – 2 days until ready to bake.


Friday, 17 December 2021

Environmentally Friendly TP Review

You’ve probably been inundated with ads for those green toilet paper companies on whatever social media you use, especially since you probably already follow a lot of vegan/earth friendly sites. As someone who could never find a vegan brand of TP I loved I thought I’d try them all and tell you what I thought :)

Depending on the brand you buy most supermarket brands will run between 77c-$1.50/roll.

The environmentally friendly options ranged between 71c-$2.25, so definitely something for everyone's budget.


Who Gives A Crap

So this was my first try at the earth friendly TP services so I went all out; I got 24 rolls of TP, a box of paper towels and a box of tissues. This company uses recycled office paper. They also have a bamboo paper option but it was more expensive and I wanted to try the regular first.  

I wasn’t overly impressed with the toilet paper. The tissue was weak and fell apart very easily, leaving bits everywhere. The paper towels were ok absorbent enough but not overly thick. The tissues were ok too but like all the other products the quality of the paper is a little rough. I don't like that the roll coverings look like donuts either. Unless that's the bathroom look you're going for of course ;)

After my success with Tushy I went back and bought the Who Gives a Crap bamboo offering. Honestly although it was stronger than the recycle paper rolls hubby’s vote went to Tushy. 

Cost for recycled paper: $1 per roll (same price with or without subscription)

Cost for Bamboo: $1.25 per roll

Products: Toilet Paper, Paper Towel


Cloud Paper

As my second try I thought I’d try a bamboo brand. I only chose TP this time to see the difference. I definitely liked it better that the recycled paper TP but still had a rough and not overly absorbent feel to it. 

Cost: $1.25 (subscription only)

Products: Toilet Paper, Paper Towel


Reel Paper

My third attempt was Reel Paper, two things I really liked about Reel was paper felt thick and absorbent the packaging is understated, it's a nice stone grey with the "R" symbol (which coincidentally is a "J" when turned upside down so that works for me LOL). What I didn't like was they don't have many other products (only paper towels) it wasn't the softest paper although thick.

Cost: $1.4 per roll with subscriptions  ($1.7 without)

Products: Toilet Paper, Paper Towel


Tushy TP

Forth purchase was Tushy, so far this was my favorite despite it being more expensive. These rolls were notably thicker and more absorbent than their counter parts, which might be due to the bamboo I'm not sure. I really loved the design as well, very classy!

Cost $1.6 per roll with subscription ($1.9 without)

Products: Bidet, Toilet Paper, Toilet accessories


Noo Trees - Amazon 

Not bought yet - no review

74c per roll

71c per roll (with 4 pack blk order)

Products: Toilet Paper, Paper Towels


Better way Bamboo TP - Amazon

Not bought yet - no review

By far the most expensive options is Better Way Bamboo toilet paper on Amazon

Cost: $2.25/roll


In conclusion, despite not having tried Better Way Bamboo or Noo Trees we decided we liked Tushy the best because of the strength of the tissue so that’s what we’ll be sticking with :)


Saturday, 20 November 2021

Red Lentil Curry

This recipe from Rainbow Plant Life (my new favourite blog) was welcomed by the whole family which I can tell you is no easy feat! I've made this numerous times now and it's always fabulous!

Red Lentil Curry

Ingredients

1 tablespoon refined or virgin coconut oil, or a neutral-flavored oil
4 cloves garlic, minced
2 inch piece of fresh ginger, peeled and minced or grated
1 tablespoon minced fresh turmeric, or 1 teaspoon ground turmeric
1-2 serrano peppers, diced (see recipe note below on spice level)
1 teaspoon ground cumin
1/2 teaspoon ground coriander
1/2 teaspoon Indian red chili powder (if you only have regular chili powder, which is a blend, use 1 teaspoon)
2 teaspoons curry powder
1 teaspoon garam masala
Kosher salt or sea salt to taste (I use about 1 tsp kosher salt, and add more at the end)
Freshly cracked black pepper to taste
1 cup (180-190g) red lentils, or split red lentils (the split variety will cook a bit quicker)
2 cups (480 mL) low-sodium vegetable broth
1 14 ounce (400-425g) can crushed tomatoes
1 13.5- ounce (400 mL) can full-fat coconut milk
3 tablespoons unsweetened creamy almond butter
1/2 a small lemon, juiced
1/2 cup (~8g) fresh cilantro, roughly chopped

For serving: Basmati or Jasmine rice 


Method

Rinse the lentils in cold water until the water runs clear.

Heat a large, deep skillet or large saucepan over medium-high heat and add the coconut oil. Once the oil is shimmering, add the garlic, ginger, fresh turmeric (if using), and Serrano pepper and cook for 2 minutes, stirring frequently to prevent garlic from burning.

Add the cumin, coriander, chili powder, curry powder, garam masala, salt, and black pepper to taste, and cook for 30 to 60 seconds until fragrant, tossing frequently to prevent burning. If using ground turmeric instead of fresh turmeric, add the ground turmeric now, along the the rest of the spices.

Pour in the vegetable broth, and use a wooden spoon or spatula to scrape up any browned bits on the bottom of the pot. Add in the lentils and the crushed tomatoes and mix well. Reduce the heat to low and cover the pan with a lid. Simmer for 20 to 25 minutes, or until the lentils are cooked through and have mostly softened. If you find that the lentils are not quite soft after 25 minutes, add a few spoons more of broth or water and cook for another 5 minutes.

Remove the lid and stir in the coconut milk, almond butter, along with salt and pepper to taste Continue cooking on low heat, uncovered for 5 to 8 minutes, until the curry has thickened and is creamy.

Finally, stir in the lemon juice and cilantro, and turn off the heat. If you want your lentils to even creamier and more on the puréed side, use an immersion blender to lightly purée the curry.

Serve the curry with rice and/or Indian flatbread and garnish with additional cilantro. Store leftovers in the fridge for 3-4 days.