Monday, 27 February 2017

Baby's 1st Birthday!

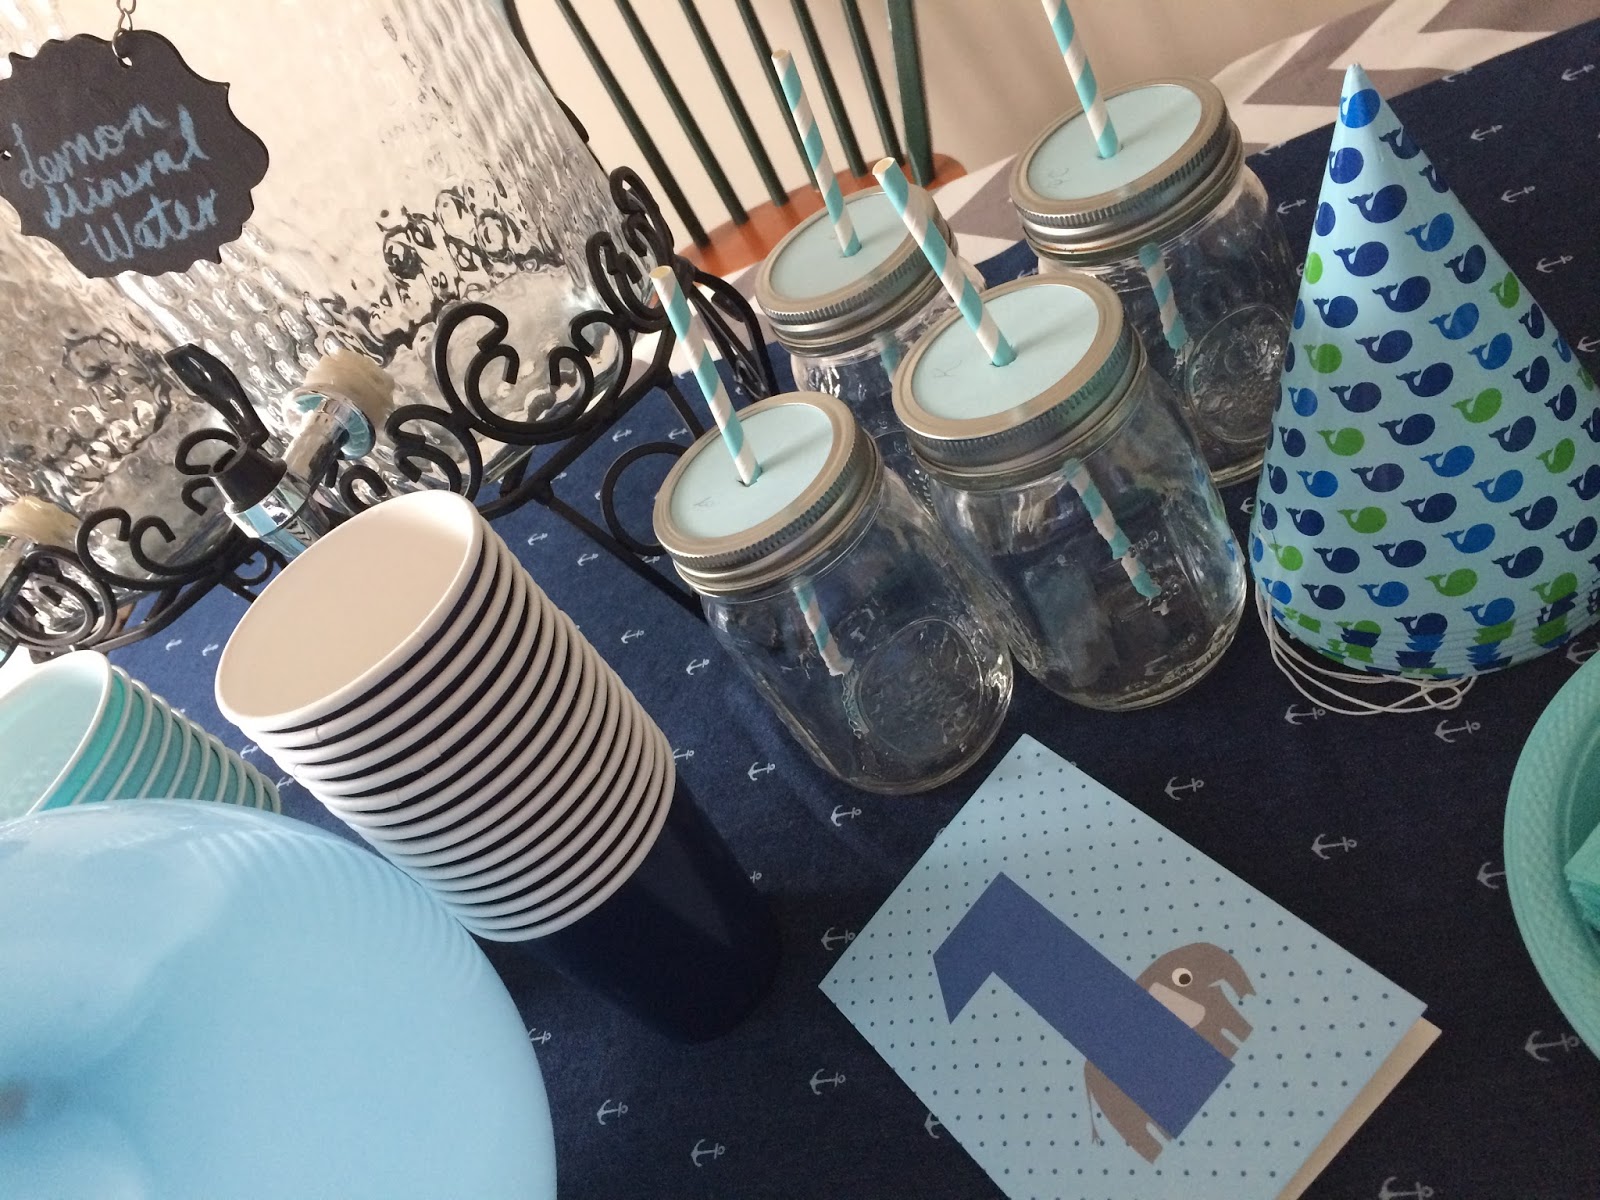
I just celebrated my lovely son's first birthday. It was a small family affair offering some games for the older children but of course all vegan fare ;)


Homemade sign was an easy sewing project with a printed fabric for either end, burlap, a ribbon and some white paint...


Got this cute whale print wrapping paper at Target.


I made this Treasure Map following instructions on YouTube and I made it look old by soaking it in tea before I started with the water colors, then I burned the edges. 


I had two drink dispensers - one with plain sparkling mineral water with lemon slices and the other with Elderflower Cordial from the UK which I bought from World Market. It was so delicious!


I made vegan crispy rice treats and shaped them with a cookie cutter.


  I made "fairy Bread" which is a fairly standard Australian birthday party staple...white bread with margarine and sprinkles. I used a cookie cutter to get the whale shape before I applied the sprinkles. I used Publix brand white bread as the ingredients were all vegan.


Vegan sprinkles!


I had cups of salted popcorn (homemade), plain potato chips and vegetable sticks (celery, cucumber, carrot and sugar snap pea).


(baby approved)


Vegan Crispy Rice Treats

 These were a hit at my son's first birthday party. Original recipe from Kelloggs.


Vegan Crispy Rice Treats

Ingredients

6 cups vegan rice puff cereal (I used Nature's Path Organic Crispy Rice)
3 tablespoons vegan butter (I used Earth Balance
10 oz.vegan marshmallows (I used Dandies Minis)


Directions
In large saucepan melt butter over low heat. Add marshmallows and stir until completely melted. Remove from heat.
Add cereal. Stir until well coated.
Using buttered spatula or wax paper evenly press mixture into 13 x 9 x 2-inch pan coated with cooking spray.
Cool for 10 minutes and then cut into 2-inch squares or use a cookie cutter to shape. 
I also sprinkled with vegan sprinkles.
Best if served the same day.


Senior Solutions: How Going Vegan Can Help Your Health in Later Life

Today's entry is a special contribution from freelance health and food writer Jessica Walter...


Senior Solutions: How Going Vegan Can Help Your Health in Later Life

Looking after your health is one of the biggest concerns seniors have to deal with, and is one of the biggest causes of financial stress in the age group. It’s never too late to reassess your lifestyle and see how you can change things to be healthier. Making the switch to a vegan diet is one of the best ways to do this. Veganism brings many health benefits for people of all ages, but can specifically benefit seniors.

The Top Health Benefits

Many common health problems are caused by a result of poor diet and lifestyle choices; so think about what healthy changes you can make to improve your health as a senior. By going vegan, you’re helping to cut out these issues at the source - and also avoid having to manage them with costly synthetic medicines.

· Heart and blood - going vegan is a great way to reduce your cholesterol, and with it, your risk of heart disease. Vegan diets help to manage many medical conditions, including high blood pressure and diabetes.

· Weight loss - your body needs less calories as it ages, so it can be easy to pile on the pounds. Vegan diets are naturally less calorific, so can help smooth this transition. Obesity is linked to all kinds of problems, from joint complaints to cancer, so this is a really positive effect of veganism.

· Digestion -  a vegan diet is high in fibre, which helps aid regular digestion and bowel processes. Gas and heartburn are caused by fatty and acidic foods, which are not present in a vegan diet.

· Optic health - brightly colored vegetables and fruits contain lots of vital minerals and nutrients which help many bodily functions, including your eyesight.


Preparing to Go Vegan

It’s important to give a little thought to your new vegan diet and make sure that it will work for you. While your calorie requirement does decrease, your requirements for certain nutrients and vitamins actually increases as you age - so check out vegan options or supplements to make sure you’re getting enough calcium to look after your bones. Consult your doctor and have some tests run to make sure you’re aware of any existing deficiencies, and research what fruits and vegetables you can eat to make up for these. It might be a little work to begin with but you’ll soon see the benefits - and have one less thing to worry about in your later life.

Thursday, 23 February 2017

Vanilla Birthday Cake with Cream Cheese Frosting

The vanilla cake recipe comes courtesy of Chloe Coscarelli. The recipe is meant for a 9" double layer cake. For my first batch I doubled the recipe and it was a disaster. It just wouldn't cook through, after a couple of hours I  started again, just using the original recipe but only using one tin. I was able to salvage enough of the other cake to make the whale pattern, luckily! The cake was still very dense in the middle, not as light as I would have liked. Some people loved the cake, some didn't. The cream cheese frosting was a recipe from the food dye I used and it turned out great.


Vanilla Cake

Ingredients

3 cups Flour
2 cups Sugar
2 tsp. Baking soda
1 tsp. Salt
1 ¾ cups Soy milk
1 cup Canola oil
¼ cup Apple cider vinegar
1 tbsp. Vanilla

Method

Preheat oven to 350. Grease two 9-inch cake pans lightly and line bottoms with parchment.:
Whisk together dry ingredients in a large bowl and set aside.
Whisk together wet ingredients and add to dry, mixing with a spoon just until well-blended.
Bake 20-25 minutes, until pick inserted in center comes out clean with just a few crumbs adhering. Invert and cool completely on wire rack.


Cream Cheese Frosting

Ingredients

16 Oz vegan cream cheese
2 cups icing/confectioners sugar
2 Tbls non-dairy milk
1 tsp vanilla extract
Food Dye (I used Color Garden)


Method

Use an electric mixer to smooth the cream cheese.
Add in sifted icing sugar slowly.
Add in milk, adding more if needed.


Thursday, 16 February 2017

Jap Chae (Korean Glass Noddle Stir Fry)

I adapted this recipe from Crazy Korean Cooking.


Jap Chae (Korean Glass Noddle Stir Fry)

Ingredients

Marinade
3 Tbls soy sauce (I used Tamari)
3 Tbls water
1 Tbls sugar (I used brown rice syrup)
1/2 tsp garlic, crushed
1 tps sesame oil
1 tsp sesame seeds
1/4 tsp black pepper

Stir Fry
5 oz Glass noodles (sweet potato noodles)
1/2 onion, sliced thinly
1 large carrot, cut julienne
1 red capsicum/pepper. sliced thinly (optional)
1/2 oz shitake musrhooms, soaked and sliced thinly
1 packet extra firm tofu, pressed and sliced into rectangle pieces.
2 oz baby spinach, blanched
1/4 tsp garlic, crushed
1/4 tsp salt
2 Tbls canola oil, for frying


Method

Whisk the marinade ingredients together and pour 1 tsp of mixture over the cut tofu. Marinade for 15 minutes or longer.
Add oil to a medium-hot frying pan/wok and sear tofu pieces on both sides till browned.

Place tofu on paper towel and set to the side.
In a large pot add water to 2/3 full and boil. Add in glass noodles and cook for around 6-8 minutes.
In the frying pan add onion and carrots and cook until soft and cooked through.

Add in mushrooms and peppers/capsicum, wait till heated through.


Add in tofu and spinach and turn heat down to low.
Drain glass noddles and return to their pot.
Using kitchen scissors cut glass noodles into 1/4 of their original length or shorter.
Add the marinade to the noodles and mix well.
Pour in stir fry ingredients and mix well with noodles.
Serve and enjoy :)

Sunday, 29 January 2017

Homemade Stock

I've been meaning to make my own stock for ages but never got around to it. It's so easy! I've been keeping kitchen scraps (all vegetable and nothing that looked like it was going bad) in the freezer in a zip lock bag. Once I had a decent amount I figured it was time! Make sure your scraps have been washed prior to freezing.


Homemade Stock

Ingredients

1 onion, chopped
1-2 carrots, chopped
2 stalks of celery, chopped
kitchen scraps (mine already included fennel, parsley, green onions etc)

Method

Roast the vegetable scraps first in a 350F oven for 30-60 mins.

 Fry up your onion, carrots and celery first with a small amount of olive oil.


Add all ingredients into a very large pot with around 6-8 cups of water or enough to cover the scrapsWith an extra inch of water on top.


Bring to boil then cover and simmer for 1 hour, or longer if you like. I like leaving it to simmer for 2 hours or more if I have the time because the flavour is stronger.
Wait till it cools before straining the liquid and store in freezer safe containers if not using within a week.


Basic Marinara Sauce

Great base for pasta sauce and soups.


Basic Marinara Sauce

Ingredients

1 tablespoon good olive oil
1 medium yellow onion, chopped finely
1 1/2 teaspoons minced garlic
1/2 cup good red wine
2 (28-ounce) can crushed tomatoes, or plum tomatoes in puree, chopped
1/4 cup chopped fresh flat-leaf parsley
1/4 cup chopped fresh basil
1 1/2 teaspoons kosher salt
1/2 teaspoon freshly ground black pepper
Method


Heat the olive oil in a large skillet or saucepan.
Add the onion and saute over medium heat until translucent, 5 to 10 minutes.
Add the garlic and cook for 1 more minute.
Add the wine and cook on high heat, scraping up all the brown bits in the pan, until almost all the liquid evaporates, about 3 minutes.
Stir in the tomatoes, parsley, basil salt, and pepper.
Cover, and simmer on the lowest heat for 45 minutes.

Homemade BBQ Sauce

Great recipe from DIY Natural. Note: I replaced all the sugars with brown rice syrup and used my own homemade Worcestershire sauce...


Homemade BBQ Sauce
(makes about 1 ½ cups sauce)

Ingredients

½ cup tomato paste
½ cup apple cider vinegar
3 Tbsp brown sugar
3 Tbsp sugar
3 Tbsp molasses
1 Tbsp Worcestershire sauce
2 tsp garlic powder
1 tsp ground mustard seed
1 tsp paprika
½ tsp onion powder
½ tsp sea salt
½ tsp ground black pepper
2 cups filtered water


Method

Mix all ingredients, except water, in a medium saucepan until combined.
Add the water and bring the mixture to a simmer, whisking to eliminate any lumps.
Simmer the mixture for 50 minutes, or until the sauce reaches your desired thickness.
Store in a sealed, glass jar in the refrigerator for 2-3 weeks.


Tuesday, 24 January 2017

Vegan Meat Pies

Recipe from Vegan Sweet & Simple! Serve with Homemade Tomato Sauce/Ketchup!


Vegan Meat Pies

Crust
1 cup superfine brown rice flour
1 cup sorghum flour (I substituted for rice flour)
½ cup potato starch
¼ cup sweet rice flour
1 tsp xanthan gum
1 tsp salt
½ cup cold, hard vegan butter or margarine.
¾ cup ice water

Filling
1½ cups of dry textured soy protein (I used Gardien crumbles so didn't need the water or bouillon)
Hot water
2 tsps vegetable bouillon paste or powder
1 small brown onion, diced
¼ cup corn flour
1 cup vegetable broth
¼ cup ketchup (I used homemade)
1 tbsp BBQ sauce (i used homemade)
1 tbsp vegan and gluten-free worcestershire sauce
2 tsps vegemite (I used Marmite).
¼ cup peas
I also included a spash of red wine
Water, as necessary


Method

Crust
In a mixing bowl, mix together the dry ingredients so that they are well combined.
Add the butter a little at a time and mix using a pastry cutter on your stand mixer or by hand using a fork.
Once the butter has been evenly incorporated into the mixture and it appears crumbly, make a well in the middle and add the ice water.
Mix with a fork until you have a nice dough, but don’t overwork it!
Pat dough together with your hands and then turn it out onto a sheet of plastic wrap.
Enclose the dough in the wrap and refrigerate for at least 30 minutes.

Filling
While the crust is chilling, prepare the filling
Put 1½ cups of dry textured soy protein in a medium bowl and cover with hot water.
Add 2 tsps of bouillon to the soy protein, mix and allow it to absorb the water and flavors until it is soft (10-15 minutes).
Heat a pan with enough oil to lightly coat the bottom for a few minutes on medium-high heat until hot.
Add the onion to the pan and sauté until soft and translucent.
Add the textured soy protein and sauté for 3-5 minutes more until it begins to brown.
Mix together the corn flour and the vegetable broth and set aside.
Add the remaining ingredients to the pan, mix well to incorporate, and allow the gravy to come to a boil and thicken.
Turn the heat down to medium-low and allow it to simmer for about 10 minutes more to allow the flavors to incorporate. You may need to add a few tablespoons of additional water here to prevent it from drying out too much.
Remove from the heat.

Preparing the pies
Turn your oven to 350 degrees Fahrenheit or 180 degrees Celsius.
Grease a 12-cup muffin tin and dust it with rice flour.
Separate the dough into 3 even pieces, roll into balls using your hands and set aside.
Place one piece of chilled dough between two sheets of plastic wrap and using a rolling pin, roll out the dough until it is about ¼ inch thick.
Using a small bowl (about 2½ inches in diameter) or something else of the size that would allow you to fill the bottom of the muffin tin, cut out rounds and gently press them into the muffin cups so that they are completely lined and there is a little bit of overhang. You should be able to cut 12 appropriately-sized rounds out of two of the three pieces of dough. Be prepared to roll out the dough several times to do this.
Fill each of the muffin tins with the filling right to the top of the pie.
Combine the remaining dough and roll out to ¼ inch thick. Using an appropriately-sized glass just big enough to cover the tops of the pies, cut out 12 rounds.
Place the rounds on top of the pies and gently press together the edges of the bottom and top crusts using your fingers first and then a fork.
With a fork, poke some holes in the top of each pie to allow the filling to breath and stop it from bursting out while baking.
If you like, brush some olive oil or butter on the top of each pie.
Place the muffin tin on the top shelf of your oven and bake for 25-30 minutes until the crust starts to lightly brown.
When done, remove from the oven and let the pies cool in the muffin tin for about 5 minutes.
Eat!
Notes
You could add additional veggies to the filling or just leave the veggies out altogether (but keep the onion!)
These pies freeze really well, so if you’re not going to eat them all within 3 or so days, just pop them in the freezer.

Sunday, 22 January 2017

Happy Australia Day!

Here are some vegan ideas for your Australia Day! Although living in the States now I try and celebrate where I can by making one or more of these items, streaming Triple J's Hottest 100 and plastering my family with Australian Flag temporary tattoos. Whatever Australia Day has in store for you I hope it's a good one. Miss my homeland so much!!!! :(